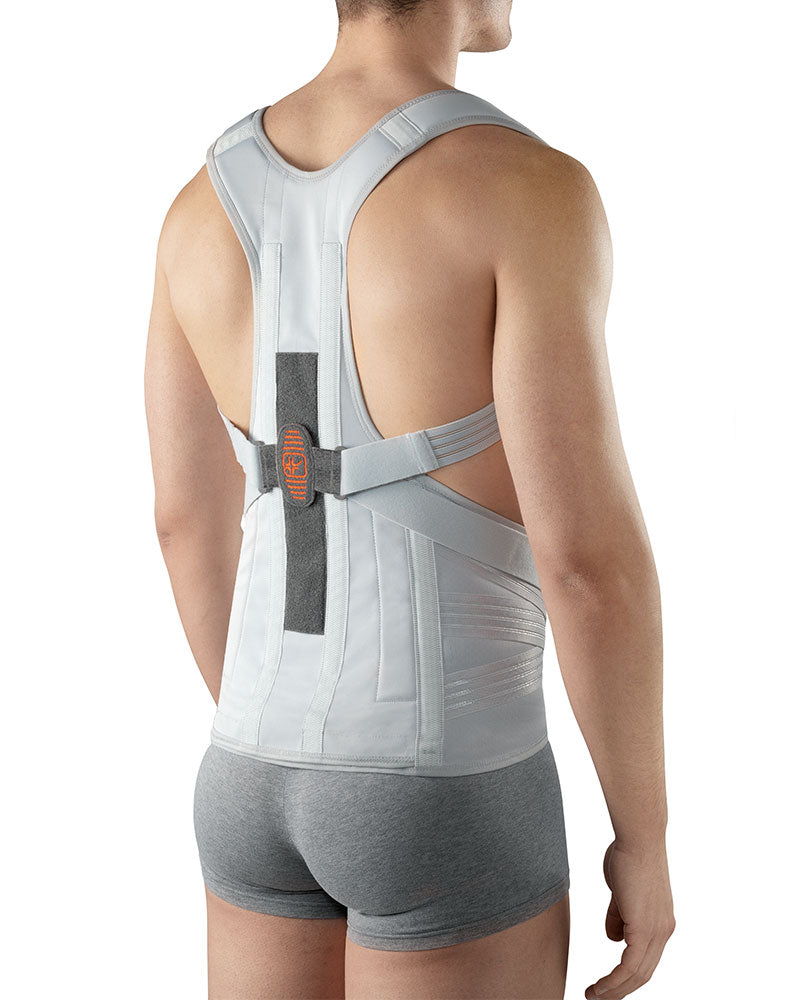
There are times when the spine needs help to lighten the weight it supports. "Teamwork" is essential to ensure proper support: materials and design must work together to provide proper compression and increase intra-abdominal pressure, but without altering trophism or muscle tone.
That's why the combination of stretchy fabric and metal frame was designed to guarantee efficiency, fit and comfort: it helps patients regain their mobility, ensuring the best possible posture and avoiding any harmful positions. The corset is put on like a backpack, making it comfortable to wear.
INDICATIONS
Size | XS | S | M | L | XL | XXL |
Pelvic circumf. cm | 70/80 | 80/90 | 90/100 | 100/110 | 110/120 | 120/130 |
Front height cm | 16 | 16 | 16 | 16 | 16 | 16 |
Back height cm | 50 | 50 | 50 | 52 | 52 | 52 |
€228.00
Dorsal-lumbar corset with shoulder straps and a support frame, FLEX-B
CHARACTERISTICS AND MATERIALS
• Made of reinforced CarbonTrace, a stretchy, breathable, ladder proof, antistatic and bacteriostatic fabric reinforced
with carbon fibre
• Adjustable padded shoulder straps with non-release Velcro® fastening system
• Additional shoulder pads
• The elasticated rear panel of the shoulder straps can be positioned at any height
• Adjustable padded shoulder straps with non-release Velcro® fastening system
• Front Velcro® fastening system
• The abdominal section is reinforced with angled spiral stays
• Mouldable inner frame in aluminium alloy
PUTTING ON THE APPLIANCE
DONNING THE ORTHOSIS FOR THE FIRST TIME
1 The orthosis comes with a rigid frame already positioned in the pocket; if this has not been prescribed, open the
bottom of the pocket, slide out the frame (fig. A) and reclose the pocket with the Velcro®. If required, shape the frame
according to the patient’s anatomy.
2 Undo the orthosis and attach the Velcro® straps to the side strips for the time being (fig. B). The ends of the shoulder
straps can also be attached to the side strips for the moment (fig. B) or folded back on themselves.
3 Put on the orthosis by sliding the arms through the shoulder straps as if it were a backpack (fig. C).
4 Close the orthosis at the front securely with the central Velcro® fastening (fig. D). Check that the front fastening is
properly centred.
5 Start to tighten the orthosis:
– Attach the lower straps to the Velcro® strip at the front (fig. E).
6 Remove the elasticated panel from the back and reattach with Velcro® at the desired height (fig. F).
7 Adjust the shoulder straps:
1. Position the ends on the Velcro® strip at the front and undo the straps from the corresponding Y-Velcro® (fig. G)
fasteners.
2. Grasp the straps and pull towards the front (fig. I).
3. Cut off any excess and attach them to the corresponding Y-Velcro® fasteners (fig. M).
8 If necessary, slide the additional pads onto the shoulder straps until they are in the required position
SUBSEQUENT WEAR
1 Undo the orthosis and attach the Velcro® straps to the side strips for the time being (fig. N). The ends of the shoulder
straps can also be attached to the side strips for the moment (fig. N) or folded back on themselves.
2 Put on the orthosis by sliding the arms through the shoulder straps as if it were a backpack (fig. O).
3 Close the orthosis at the front securely with the central Velcro® fastening (fig. P). Check that the front fastening is
properly centred.
4 Start to tighten the orthosis:
– Attach the lower straps to the Velcro® strip at the front (fig. Q).
5 Grasp the straps and pull towards the front (fig. R). Attach them to the Velcro® on the strip at the front (fig. S).
MAINTENANCE
Do not bleach No chemical cleaning
Do not iron Do not tumble-dry
Washing instructions:
– Slide out the metal part
– Hand wash in lukewarm water with mild soap; rinse thoroughly.
– Leave to dry away from direct heat.
– Slide the metal part back into place
Dispose of this product and its parts responsibly