easy return
 secure payment
 delivery 1-2 days
easy return
secure payment
delivery 1-2 days
delivery 1-2 days
easy return
secure payment
delivery 1-2 days


Now the dynamic ShoulderCross brace offers an innovative alternative treatment that has proven to be extremely helpful in all clinical cases:
INDICATIONS
| Size | S | M | L | XL |
| Circumference of the biceps, cm | 22/26 | 26/30 | 30/35 | 35/40 |
€92.00
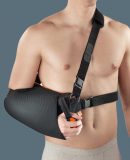
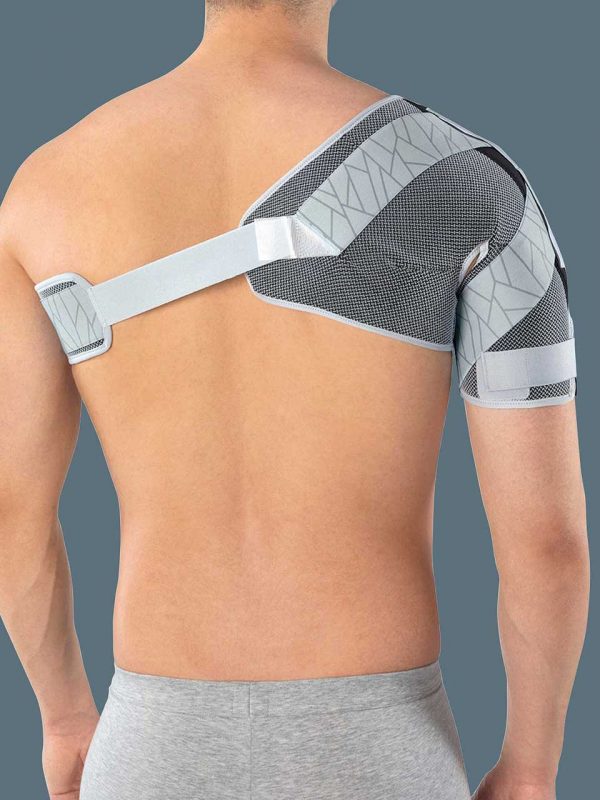
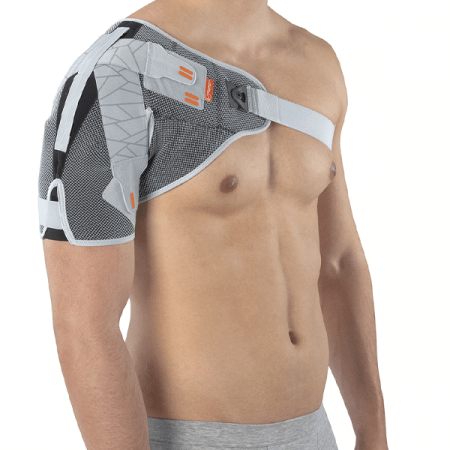
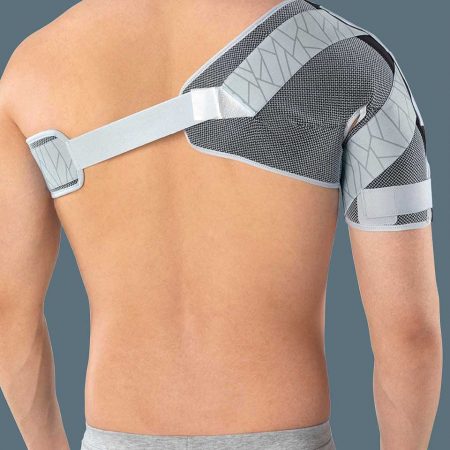
Functional shoulder brace Shouldercross
CHARACTERISTICS AND MATERIALS
• BreathSkill fabric structure:
– Soft and breathable
– 3D fabric
– External coverage made of a strong mesh fabr
• Crossover elastics for a perfect joint stabilization
• Lateral adjustable belt; partially elastic and underarm padding
• Adjustable arm with elastics and Velcro® fastening system
• Reinforcement pad in viscoelastic material, internally applicable with Velcro®
PUTTING ON THE APPLIANCE
INITIAL FITTING
A Undo the buckle and undo the Velcro® fastening on the arm.
B Slide the arm into the tubular part, keeping the buckle towards the top and the elasticated arm
fastening towards the bottom. Pull the brace up the arm until it almost touches the neck and the
shoulder is completely covered. (fig.1)
C Secure the elasticated arm fastening with Velcro® so that the tubular part fits snugly but without
blocking the circulation. (fig.2)
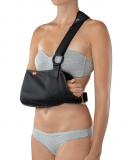
D Hold the rear fastening strap, pass it under the opposite armpit (fig.3a) and fasten the buckle at the
front (fig.3b).
E Adjust the length of the fastening strap at the front (fig.4a) and at the back (fig.4b), so that the
padded part is centred under the armpit: cut off the excess part and secure the strap with the
Y-Velcro® fastener.
CAUTION: the strap must be taut to prevent the brace from moving but not so tight that it blocks the
circulation. WE RECOMMEND continuing step by step so that you do not risk cutting off too much.
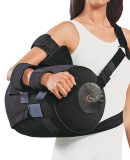
F Tighten and fasten the two elasticated straps as prescribed by a doctor (both straps can be passed
through the upper loop or one through the lower loop and one through the upper loop, depending on
which movements require greater restriction).
– Fasten the upper strap to the lower Velcro® on the arm (fig.5a).
– Crossover and fasten the lower strap to the upper Velcro® situated near the buckle (fig.5b).
G Move the arm a little a few times to check that the brace is very stable. If necessary, adjust the
underarm strap again.
SUBSEQUENT WEAR
H Undo the buckle and undo the Velcro® fastening on the arm.
I Slide the arm into the tubular part, keeping the buckle towards the top and the elasticated arm
fastening towards the bottom. Pull the brace up the arm until it almost touches the neck and the
shoulder is completely covered. (fig.10)
J Hold the rear fastening strap, pass it under the opposite armpit (fig.11a) and fasten the buckle at the
front (fig.11b).
K Tighten and fasten the two elasticated straps:
– Fasten the upper strap to the lower Velcro® on the arm (fig.12a).
– Crossover and fasten the lower strap to the upper Velcro® situated near the buckle (fig.12b).
MAINTENANCE
Do not bleach No chemical cleaning
Do not iron Do not tumble-dry
Washing instructions: hand wash at max. 30° C with neutral soap (a sponge is recommended);
do not dry in the vicinity of heat sources.
Do not dispose of the product or any of its components into the environment
Brace acromioclavicular joint subluxation. Support for dislocation of the acromioclavicular joint ACROMION 2.0


Belameks SIA (Registration Number 40003463961)
Address: Rīga, Gunāra astras street 1C, LV-1084
Phone: +371 26191929
Email: info@orthoservice.lv
secure payment